AutoGPT Agent setup
🐋 Set up & Run with Docker | 👷🏼 For Developers
📋 Requirements
Linux / macOS
- Python 3.10 or later
- Poetry (instructions)
Windows (WSL)
- WSL 2
- See also the requirements for Linux
- Docker Desktop
Windows
Attention
We recommend setting up AutoGPT with WSL. Some things don't work exactly the same on Windows and we currently can't provide specialized instructions for all those cases.
- Python 3.10 or later (instructions)
- Poetry (instructions)
- Docker Desktop
🗝️ Getting an OpenAI API key
Get your OpenAI API key from: https://platform.openai.com/account/api-keys.
Attention
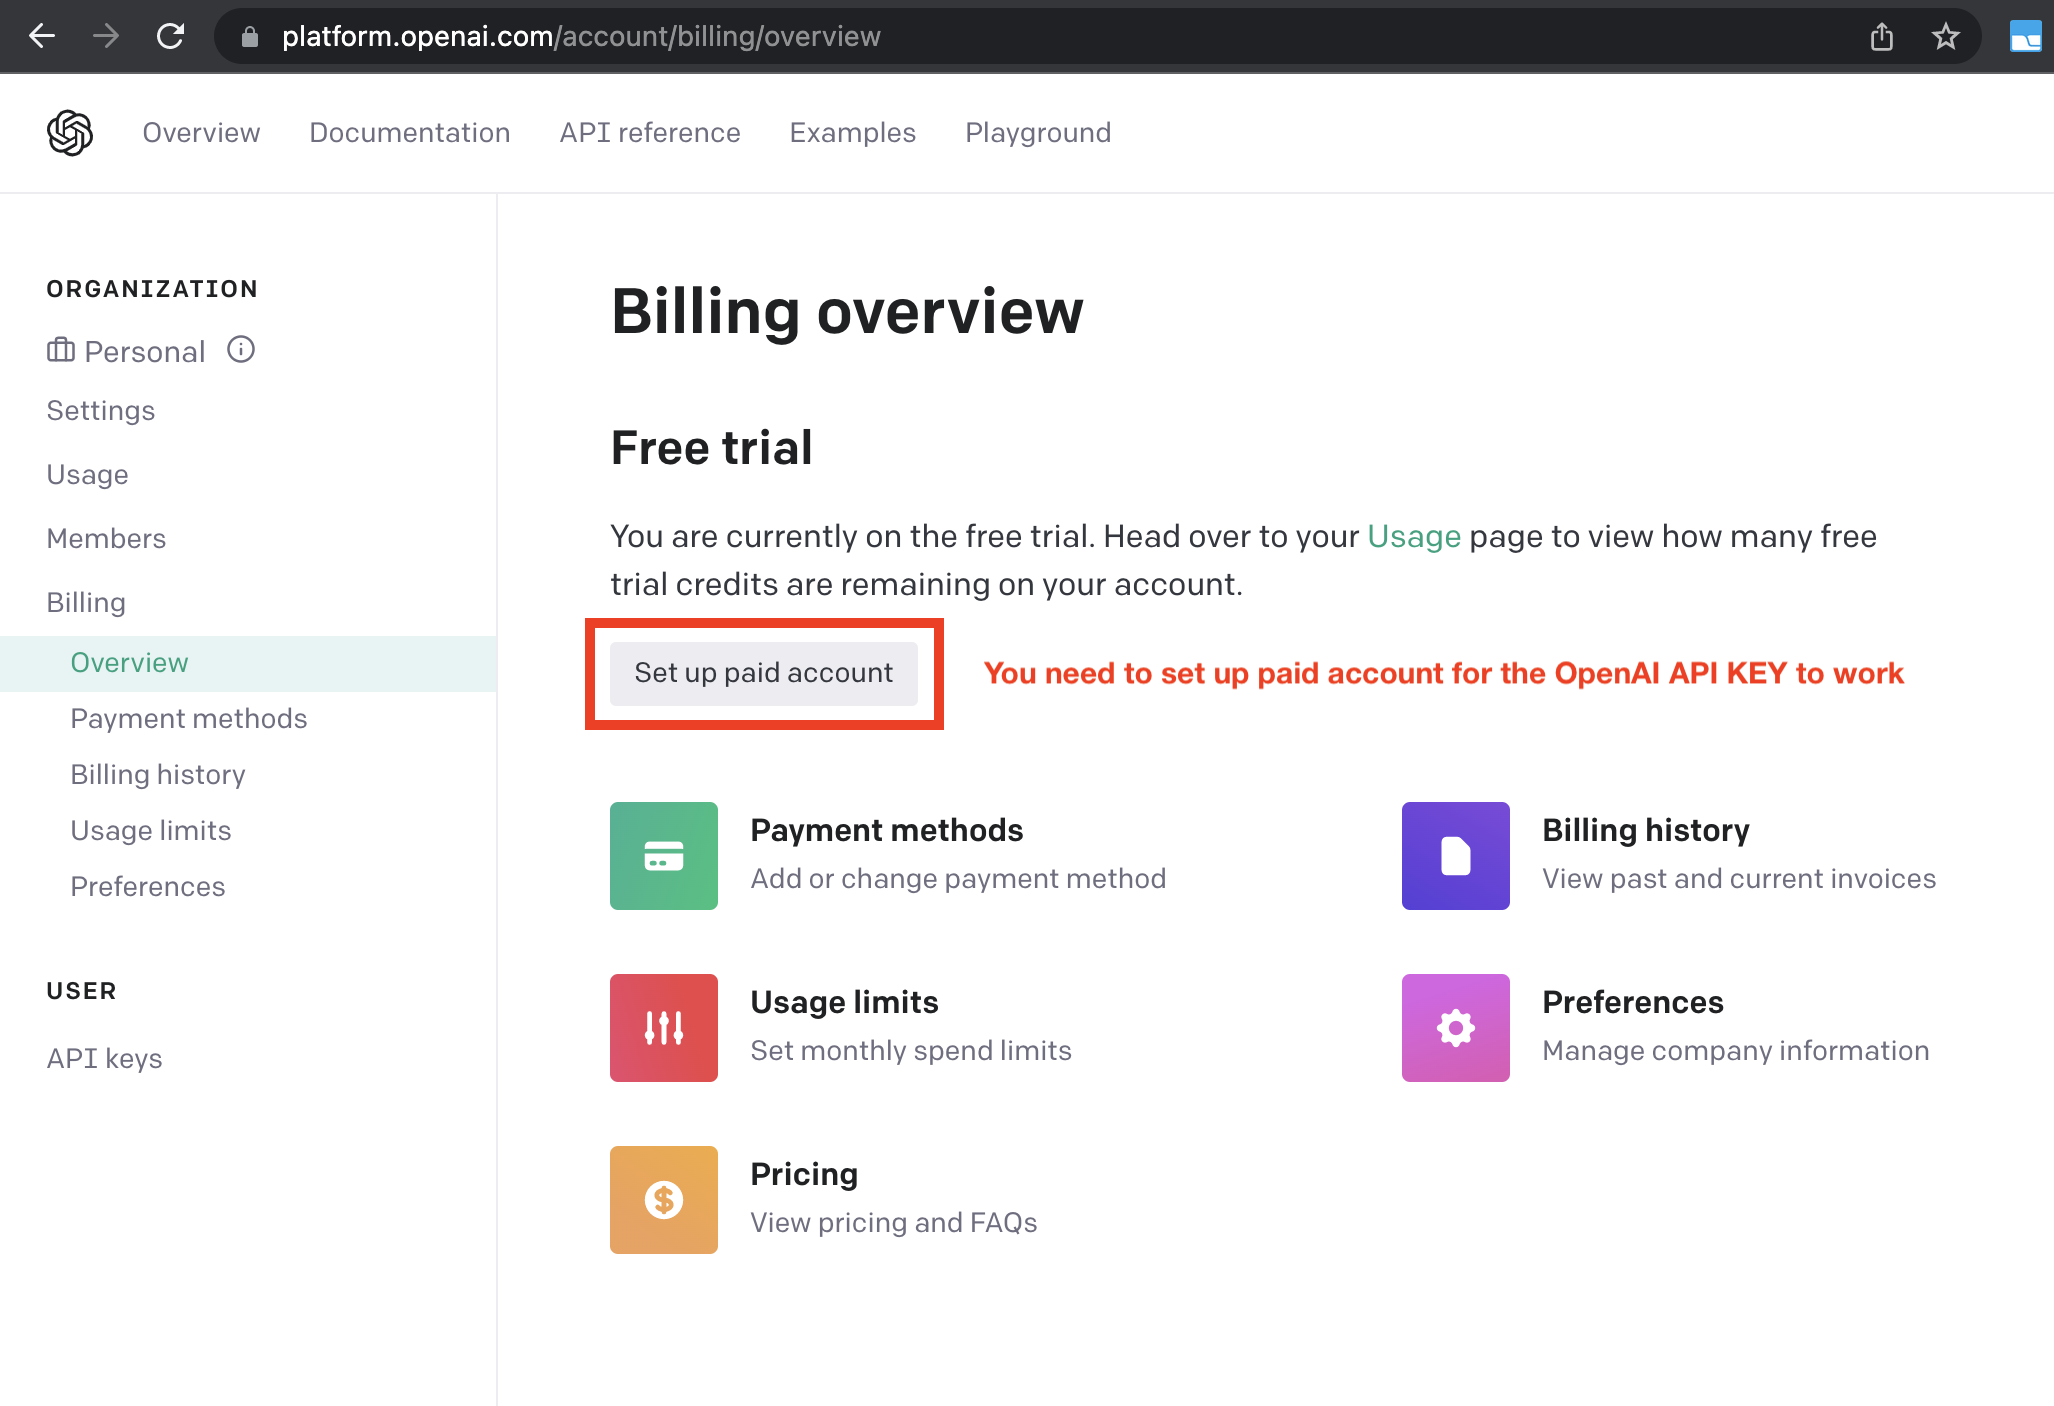
To use the OpenAI API with AutoGPT, we strongly recommend setting up billing (AKA paid account). Free accounts are limited to 3 API calls per minute, which can cause the application to crash.
You can set up a paid account at Manage account > Billing > Overview.
Important
It's highly recommended that you keep track of your API costs on the Usage page. You can also set limits on how much you spend on the Usage limits page.
Setting up AutoGPT
Getting AutoGPT
Since we don't ship AutoGPT as a desktop application, you'll need to download the project from GitHub and give it a place on your computer.
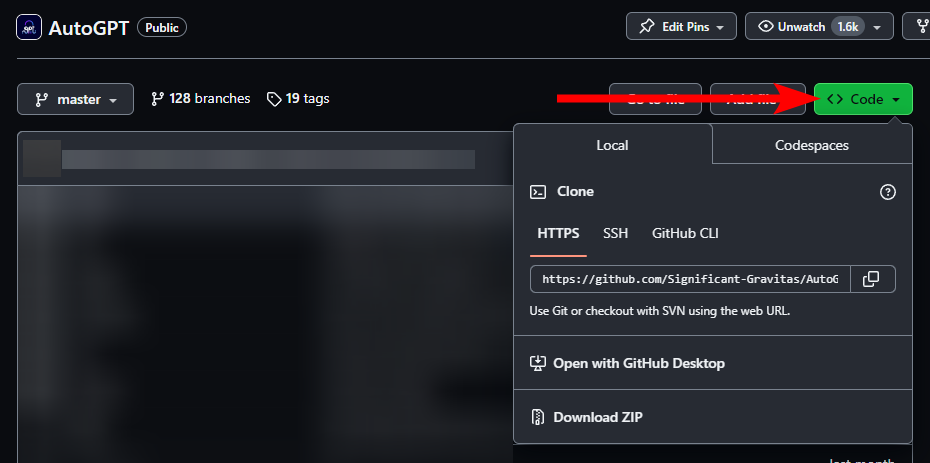
- To get the latest bleeding edge version, use
master. - If you're looking for more stability, check out the latest AutoGPT release.
Note
These instructions don't apply if you're looking to run AutoGPT as a docker image. Instead, check out the Docker setup guide.
Completing the Setup
Once you have cloned or downloaded the project, you can find the AutoGPT Agent in the
autogpts/autogpt/ folder. In this folder:
- Find the file named
.env.template. This file may be hidden by default in some operating systems due to the dot prefix. To reveal hidden files, follow the instructions for your specific operating system: Windows and macOS. - Create a copy of
.env.templateand call it.env; if you're already in a command prompt/terminal window:cp .env.template .env - Open the
.envfile in a text editor. - Find the line that says
OPENAI_API_KEY=. -
Insert your OpenAI API Key directly after = without quotes or spaces..
OPENAI_API_KEY=sk-qwertykeys123456Using a GPT Azure-instance
If you want to use GPT on an Azure instance, set
USE_AZUREtoTrueand make an Azure configuration file.Rename
azure.yaml.templatetoazure.yamland provide the relevantazure_api_base,azure_api_versionand deployment IDs for the models that you want to use.E.g. if you want to use
gpt-3.5-turbo-16kandgpt-4-0314:# Please specify all of these values as double-quoted strings # Replace string in angled brackets (<>) to your own deployment Name azure_model_map: gpt-3.5-turbo-16k: "<auto-gpt-deployment>" ...Details can be found in the [openai-python docs], and in the [Azure OpenAI docs] for the embedding model. If you're on Windows you may need to install an MSVC library.
-
Enter any other API keys or tokens for services you would like to use.
Note
To activate and adjust a setting, remove the
#prefix. -
Save and close the
.envfile. - Optional: run
poetry installto install all required dependencies. The application also checks for and installs any required dependencies when it starts.
You should now be able to explore the CLI (./autogpt.sh --help) and run the application.
See the user guide for further instructions.